Basic Guide
To using Structural Insulated Panels (SIPs)
All of our kits are built using Structural Insulated Panels from floor to ceiling
We have a wealth of knowledge in the construction, Landscaping and Timber Products Manufacture sectors.
We have combined our experiences to design a system which is truly unique and have introduced it to many sectors in the UK.
[/ult_animation_block]Before Starting
Check condition of all parts. slight damage to corner of panel during installation should not affect the structural integrity of the panel
Store Panels in dry conditions
Storing panels in wet conditions will adversely affect the performance of the panels and may cause fitting problems. Panels fitted in wet weather can swell at the seams. Use of a plastic sheet during build can prevent water damage and keep floor clean
Foundations differ for each build, efforts should be made to fix or anchor the building to the base or piles. A level base is essential.
Any timbers cut to size should have ends retreated with suitable preservative.
[/ult_animation_block]
Let's Build!
Our Kits Are Super Easy To Construct
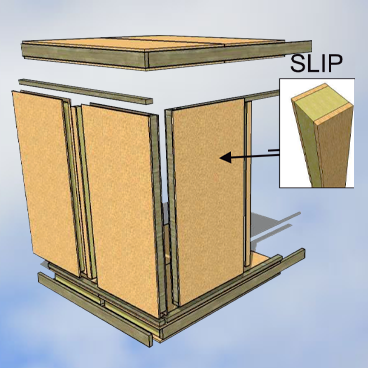
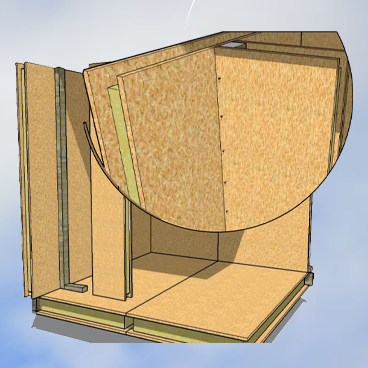
Join between panels screwed every 6 to 8 inches Polyurethane glue used on all joints
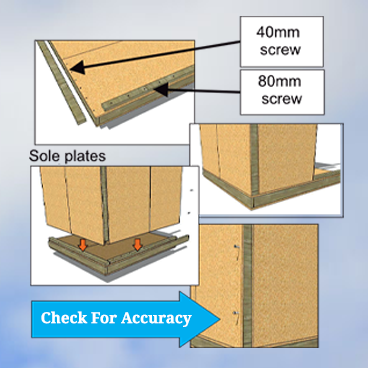
Polyurethane glue used on all joints Use 40mm & 80mm screws Check for accuracy and torx scew the corner together
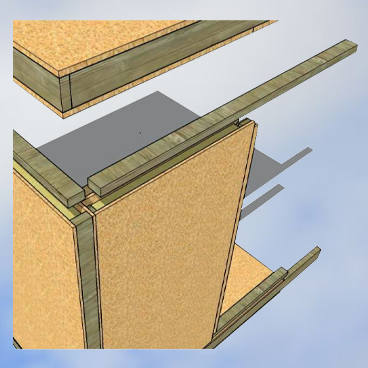
Top ring beams placed in and screwed every 6 to 8 inches inside and outside faces
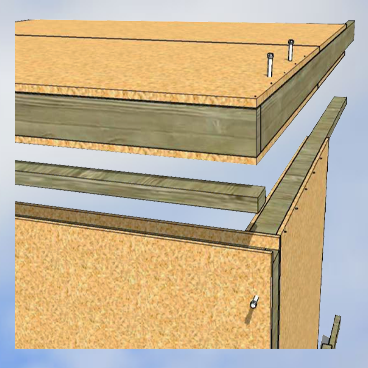
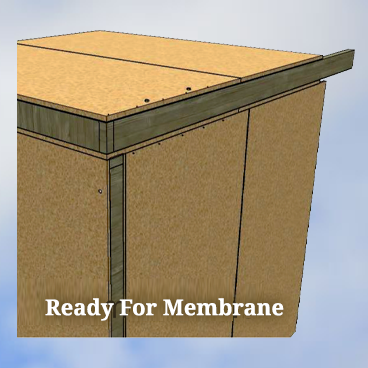
Roof panels have timber edges 40mm screws used for positioning Torx screws used to secure roof panels
Internal walls are fixed using a timber insert screwed to the wall with 80mm screws the the wall panel slotted on and screwed with 40mm screws on both sides keeping 6 to 8 inches between screws
Overhangs and battens for rubber roof are applied with screws

Construction Notes
Things To Consider....
Remember to check squareness when securing each panel , use a couple of screws first , check the if square continue with fixing.
Start at one corner for stability then connect each subsequent panel meeting at a door or window depending on design.
The panels will be affected by moisture if stored outside for long period prior to building, this may make joints tight.
Foam adhesive may be used for a full airtight joint. It is recommended that you fit the panel first to check alignment then remove to apply foam
(as it is fast expanding).
Useful tools
Power screwdriver / Impact Driver (very good for Timberlock or Torx bolts)
Call Today - 0800 920 2838
Let's get your project started...

